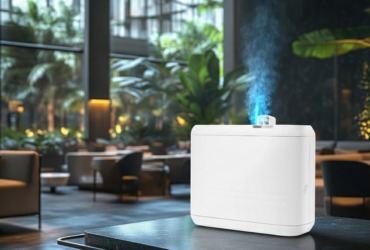
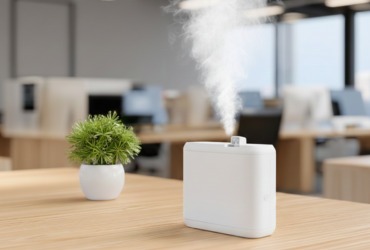
Aroma Diffuser AP O505LBW
The AP O505LBW Aroma Diffuser is a high capacity, Bluetooth enabled scenting system engineered for large commercial environments, offering powerful fragrance coverage of up to 830 m². Equipped with an 850 ml bottle, a durable atomizing system, and a 12V/2A power supply, it supports 20 adjustable intensity grades and fully customizable spray/pause cycles through both the LCD control panel and the Scent Marketing mobile app. Users can create up to five daily schedules, calibrate oil consumption for accurate remaining days tracking, and manage device settings with secure password protection. The diffuser includes a wall mounting kit, sealing tape for airtight installation, and a keyed lock for added security. Designed for continuous professional use, it features auto lock protection, fan control, and clear troubleshooting guidance, while routine alcohol based cleaning ensures optimal atomization performance in hotels, malls, conference halls, spas, and other large scale spaces.
Product Overview & Key Features
Dual Control Modes
Seamlessly manage settings via the "Scent Marketing" Bluetooth App or the built-in LCD panel.
High Capacity
An 850ml bottle supports long-term diffusion, significantly reducing refill frequency in busy environments.
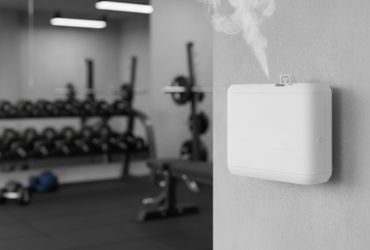
Massive Coverage
Engineered to scent areas up to 830 m² / 2500 m³ (88,000 ft³).
Precision Scenting
20 adjustable intensity levels and up to 5 custom daily schedules.
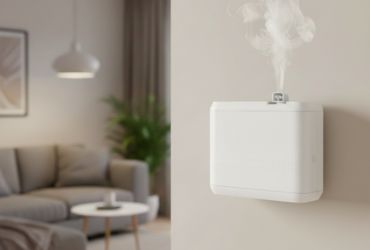
Commercial Reliability
Durable, impact-resistant housing with a secure locking mechanism and wall-mountable design.
Product Specifications
| Property | Specification |
|---|---|
| models | AP O505LBW |
| Bottle Capacity | 850ml |
| Input Voltage | DC 12V 2A |
| Power Consumption | 7W – 12W |
| Coverage Area | 1150m³ – 2500m³ (40,600ft³ – 88,000ft³) |
| Dimensions | 295mm * 222mm * 112mm |
| Material | High-Quality Industrial Plastic |
| Net Weight | 1.9kg / 2.13kg |
In the Box: Diffuser Unit, 850ml Bottle, Atomizing Nozzle & Connector, PU Tube, Mounting Bracket & Screws, Sealing Tape, Security Key, and User Manual.
Installation & Setup
How to Install the Machine on the Wall
Installing the Expansion Anchors
1. Drill a hole into the wall at the desired mounting location.
2. Insert the expansion anchor into the drilled hole.
3. Place the screw into the anchor and tighten it securely.
Mounting the Diffuser
1. Align the mounting bracket with the exact position where you want to install the diffuser.
2. Drill a hole and insert the expansion anchor into the wall.
3. Attach the mounting bracket firmly using the provided screws.
4. Hang the diffuser onto the mounted bracket to complete the installation.
Bluetooth App Configuration
1- Download:
Search for "Scent Marketing" in the App Store or Google Play.
2- Connect:
Enable Bluetooth and Location services. Select the "Bluetooth version" and find your device.
3- Login:
Enter the default password: 8888. (To reset the password, hold the ENT button on the device for 3–5 seconds).
4- Set Schedules:
Program up to 5 periods with specific start/stop times and intensity levels.
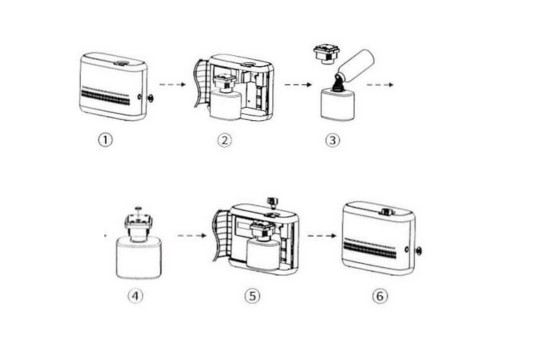
How to Refill Essential Oils
Refilling the diffuser is simple and only takes a few minutes. Follow the steps below to ensure proper installation and prevent leakage.
1. Unlock the device:
Use the provided key to unlock the front panel of the machine.
2. Remove the diffuser head and bottle:
Gently pull out the diffuser head along with the attached bottle.
3. Open the bottle and refill:
Twist off the bottle cap and fill the bottle with your preferred essential oil.
4. Reassemble the diffuser head:
Insert the seal gasket into place, then tighten the diffuser head securely to prevent air leakage.
5. Reinstall the bottle
Place the bottle back into the machine and screw the atomized connector firmly.
6. Set your working schedule
After reinstalling, adjust your operating schedule if needed and lock the machine again using the key.

Manual LCD Operation
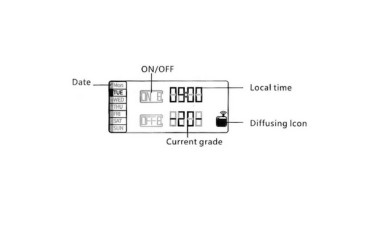
Unlock Panel
The buttons lock after 60s. Press and hold SET for 3 seconds to unlock.
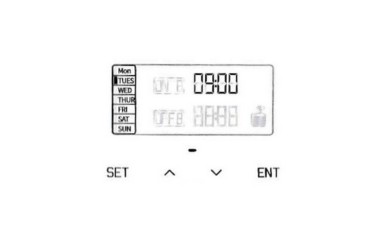
Fan Control
Hold ▲ for 3s to turn the fan ON; hold ▼ for 3s to turn it OFF.

Local Time
Hold SET (3s) → Select Day → Press ENT → Set Time using ▲/▼.
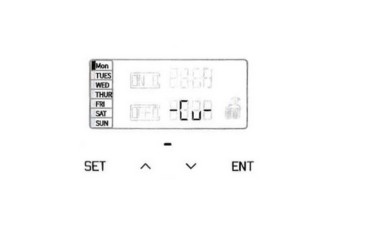
Note on "-Cu"
If the screen displays "-Cu", it means a Customized Mode is active via the App. Manual intensity changes are disabled in this mode.
Intensity Grades & Consumption Guide
| Grade | Work Time (s) | Stop Time (s) | Consumption (g/h) |
|---|---|---|---|
| G1 | 15 | 300 | 0.14 |
| G2 | 15 | 150 | 0.23 |
| G3 | 20 | 120 | 0.39 |
| G4 | 20 | 85 | 0.40 |
| G5 | 25 | 80 | 0.60 |
| G6 | 30 | 75 | 0.85 |
| G7 | 30 | 60 | 1.00 |
| G8 | 30 | 50 | 1.20 |
| G9 | 30 | 40 | 1.50 |
| G10 | 30 | 33 | 1.72 |
| G11 | 33 | 30 | 1.89 |
| G12 | 40 | 30 | 2.20 |
| G13 | 50 | 30 | 2.50 |
| G14 | 60 | 30 | 2.70 |
| G15 | 75 | 30 | 2.93 |
| G16 | 80 | 25 | 3.20 |
| G17 | 85 | 20 | 3.50 |
| G18 | 120 | 20 | 3.80 |
| G19 | 150 | 15 | 4.00 |
| G20 | 300 | 15 | 4.20 |
| Custom | 5–500 | 5–500 | - |
Notes
- Actual consumption may vary depending on the viscosity of the essential oil.
- For best performance, use oils with viscosity below 30 mPa·s.
- Higher grades = stronger scent + higher consumption.
- Lower grades = lighter scent + lower consumption.
Maintenance & Cleaning
Step 1:
Remove the diffuser head and bottle.
Step 2:
Fill the bottle with a small amount of isopropyl (industrial) alcohol.
Step 3:
Run the device for 5–10 minutes to clear the atomizing core.
Step 4:
Air dry completely before refilling with essential oil.
Safety Cautions
- 1 Vertical Operation Only Never tilt or lay the device flat while oil is inside; this will damage the internal pump and cause leakage.
- 2 Keep Dry Avoid exposure to moisture or high-humidity environments.
- 3 Power Safety Use only the provided 12V power adapter. Disconnect power during cleaning.
Important Safety Cautions
The diffuser may not be in an active schedule, or the selected mode may be incorrect. Check your working periods and ensure the device is currently set to ON. If the air pump is damaged, it will need replacement.
A clogged or worn atomizing core can reduce mist strength. Clean it with alcohol or replace it. Also check the gasket and tubing to ensure all connections are tight and secure.
Leakage usually occurs when the bottle or atomizing head is not tightened properly. Make sure both are firmly secured and inspect the gasket for any damage.

If oil sprays instead of diffusing, the atomizing core may be damaged, or the device may be tilted. Replace the core and ensure the diffuser is always kept upright.
Unusual noise often indicates a loose or failing air pump. Tighten the pump if possible. If the noise continues, the pump may need to be replaced.
For further technical support or bulk inquiries, please contact our support team via the website contact form.